>/posts/RE:1 Building an Android Lab for CTF Competitions $
Estimated reading time: 23 minutes
Introduction
Quite a few of my posts focus on solving challenges involving reverse engineering of mobile applications from CTF competitions. Although in one of my previous posts I briefly described how to approach this topic, I'd like to cover it more extensively here, highlighting particularly important parts that I'll likely come back to myself from time to time when I need a refresher. We'll start with the tools required for this purpose. A one-time environment setup may take some time, but it can save a lot of it in the long run.
Static analysis toolkit overview
For this stage, you'll need to download apktool, dex-tools, jd-gui and if you don't have actual *.apk file Apk Extracotr is handy as well.
Apktool
Is responsible for APK decompilation and extraction of static resources from within the apk file. It allows you to turn file.apk into structured directories containing all the files and classes form the app. Since many applications also use dynamically loaded native libraries written in C or C++, Ghidra can be very useful as well.
Dex-tools
Dex-tools allows you to convert Dalvik bytecode (.dex) into Java-like pseudocode. This greatly simplifies code reading and makes it much easier to navigate through classes, methods, and control flow—especially when compared to raw smali code.
Jd-gui
Once you've extracted the APK and converted it using dex-tools, JD-GUI lets you inspect the resulting pseudocode in a readable, IDE-like interface. It's particularly useful for understanding application logic, tracing execution paths, and spotting hidden or unused functionalities.
Apk Extractor
APK Extractor comes in handy when you don't have direct access to the APK file, for example, when the application is installed from the Play Store or another mirror. It allows you to extract the installed APK directly from the device or emulator, making it available for further static and dynamic analysis.

Some Automation at its Finest
To avoid repeating the same decompilation commands every time, I wrote a simple helper script:
@echo off
setlocal enabledelayedexpansion

:: Check if argument was provided
if "%~1"=="" (
    echo Usage: apk-analyze ^<path_to_apk^>
    echo Example: apk-analyze C:\ctf\app.apk
    exit /b 1
)

:: Get full path to APK
set "APK_PATH=%~f1"
set "APK_DIR=%~dp1"
set "APK_NAME=%~n1"

:: Check if file exists
if not exist "%APK_PATH%" (
    echo Error: File %APK_PATH% does not exist!
    exit /b 1
)

:: Paths to tools
:: Adjust to match your system paths
set "DEX2JAR=C:\dex-tools-v2.4\d2j-dex2jar.bat"
set "APKTOOL=C:\apktool\apktool.bat"

echo ================================================
echo APK Analysis: %APK_NAME%
echo Directory: %APK_DIR%
echo ================================================
echo.

:: Navigate to APK directory
cd /d "%APK_DIR%"

:: 1. Dex2jar - conversion to JAR
echo [1/2] Running dex2jar...
set "JAR_OUTPUT=%APK_NAME%-dex2jar.jar"
call "%DEX2JAR%" "%APK_PATH%" -o "%JAR_OUTPUT%" --force
if errorlevel 1 (
    echo Error during dex2jar conversion!
) else (
    echo Success: %JAR_OUTPUT%
)

echo.

:: 2. Apktool - decompilation
echo [2/2] Running apktool...
set "APKTOOL_OUTPUT=%APK_NAME%_decompiled"
call "%APKTOOL%" d "%APK_PATH%" -o "%APKTOOL_OUTPUT%" -f
if errorlevel 1 (
    echo Error during apktool decompilation!
) else (
    echo Success: %APKTOOL_OUTPUT%\
)

echo.
echo ================================================
echo Analysis completed!
echo Results saved in: %APK_DIR%
echo - JAR: %JAR_OUTPUT%
echo - Decompiled: %APKTOOL_OUTPUT%\
echo ================================================
endlocal
Dynamic toolkit and setup
To perform open heard operation like on an actual app you'd need to accomplish couple more steps to get everything done but don't worry I'll explain everything.
Emulator
The first thing we need is an emulator as we have to run the downloaded applications somewhere after all. I use BlueStacks for this purpose; its free version has been completely sufficient for me so far. Moreover, it runs stably and is simple to configure. It can be downloaded from the following link: Click.
Debug Bridge
The next required tool is Android Debug Bridge (adb). It's essentially a terminal that allows us to connect to a selected device something like SSH for Linux systems. There's no real need to elaborate further here; it's simply required. It's available for download together with the Android SDK tools at: Click.
Actual debuger
To analyze an application's behavior in real time on our emulator, we need a debugger for the Android system. This role is fulfilled by Frida, which is an incredibly powerful yet user friendly tool. Released versions of Frida are available at: click. Before downloading, you should check which CPU architecture your emulator is using.
Instalation
Once you downloaded and installed adb and Bluestacks it's time co connect everything together. Make sure that Android Debug Bridge is enabled in the BlueStacks settings.
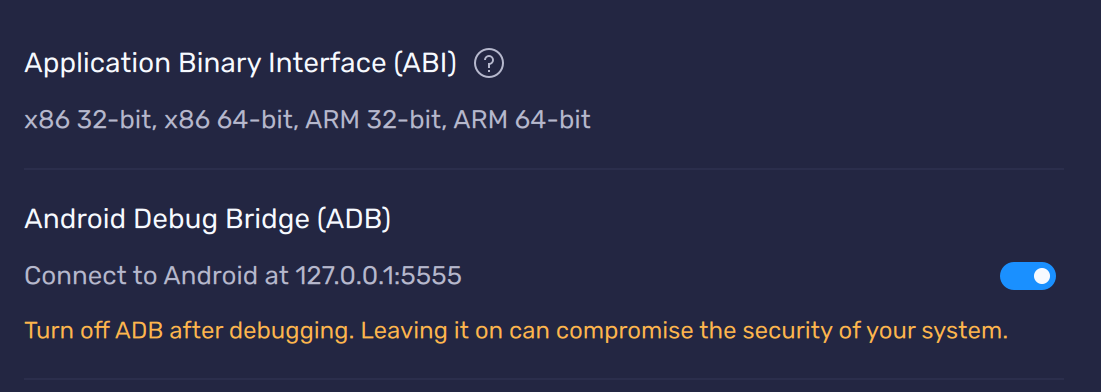
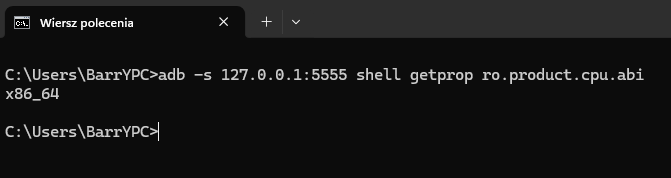
If you're using a PC, in the vast majority of cases this will be x86_64. You can verify this by connecting to the selected device and executing the following command:
adb -s 127.0.0.1:5555 shell getprop ro.product.cpu.abi
Root access will also be required. To enable it, ensure that all lines containing the phrase root in the file:
C:\ProgramData\BlueStacks_nxt\bluestacks.conf
have their value set to 1.
Once that's done, it's time to push the Frida server into the emulator. If the previous command for checking the CPU architecture executed correctly, you can be confident that adb connects properly to the emulator. You can then run:
adb -s 127.0.0.1:5555 push frida-server /data/local/tmp
Root access is needed to set proper permissions for the transferred Frida server. Execute the following commands:
adb -s 127.0.0.1 shell
su
cd /data/local/tmp
chmod +x frida-server
./frida-server &
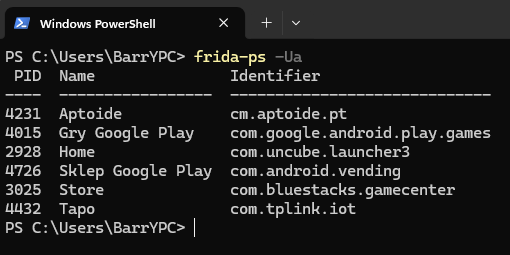
Then, in a regular terminal (without an active adb shell session), run:
frida-ps -Ua
If you see output similar to the screenshot below, congratulations you've successfully installed the debugger on your emulator.
How to Frida?
Frida, unlike more traditional debuggers (such as GDB), doesn't rely on shortcuts or an interactive debugging interface. Instead, it provides a very flexible and developer-friendly scripting approach. You can write your hooks using either Python or JavaScript. Personally, I stick to JavaScript for most cases.
Most useful scripts, examples, and common patterns can be found directly in Frida's official documentation, which is an excellent resource on its own: Click
Most mobile challenges I've encountered in CTFs involved relatively simple reverse engineering of a flag-checking function. My usual workflow starts by simply running the application, entering random input, and observing its behavior. If the app responds with a popup, toast, or alert message, it's important to note the exact text being displayed you can even take a screenshot for reference.
In many cases, this message belongs to the 'else' branch of the flag verification logic. Once you have the string, you can search for it using one of the static analysis tools mentioned earlier. I used this exact approach in one of my previous posts:
post
Sometimes, however, you won't find a direct reference to the displayed string in the code. This often happens in multi-language applications, where the logic layer only contains string identifiers or resource tags rather than the actual text shown to the user.
Even in such cases, you can still correlate UI elements with the surrounding logic. Don't worry we'll cover this scenario now. Open the view you're interested in and use the following commands:
adb -s 127.0.0.1:5555 shell uiautomator dump /sdcard/ui.xml

adb -s 127.0.0.1:5555 pull /sdcard/ui.xml .
The dump you've just obtained may be quite large and contain a lot of nodes, depending on the application you're analyzing. At this stage, however, you can search for the exact text you observed on the screen. The most important field to focus on is the 'resource-id'. This value usually corresponds directly to a class or view identifier that you should be able to find in the extracted code. Once you locate it, you've effectively bridged the UI layer with the application logic.
From here on, you can start the actual reverse engineering process.
Test mode
Some applications don't install as smoothly as others. If you encounter any errors during installation, try installing the app manually and observe the error messages printed to the console. These logs often provide valuable hints about missing permissions, unsupported architectures, or security mechanisms that may interfere with the installation process.
pm install -r -d "/sdcard/DCIM/SharedFolder/appname.apk"
Here are most common errors:
INSTALL_FAILED_NO_MATCHING_ABIS

INSTALL_PARSE_FAILED_NO_CERTIFICATES

INSTALL_FAILED_UPDATE_INCOMPATIBLE

INSTALL_FAILED_INVALID_APK

INSTALL_FAILED_TEST_ONLY
If the last issue applies to your case, add the '-t' parameter to the installation command:
pm install -t -r -d "/sdcard/DCIM/SharedFolder/appname.apk"
Full setup
There is one more trick that's definitely worth to be mentioned; proxying all application requests through Burp Suite and logging them to a file.
For this purpose, I created a Frida script that hooks the HTTP request builder and rewrites all destination URLs to '10.0.2.2:8888'. This address points to the host machine's loopback interface, where my local Ruby server is listening, logging incoming requests to a file, and forwarding them further.
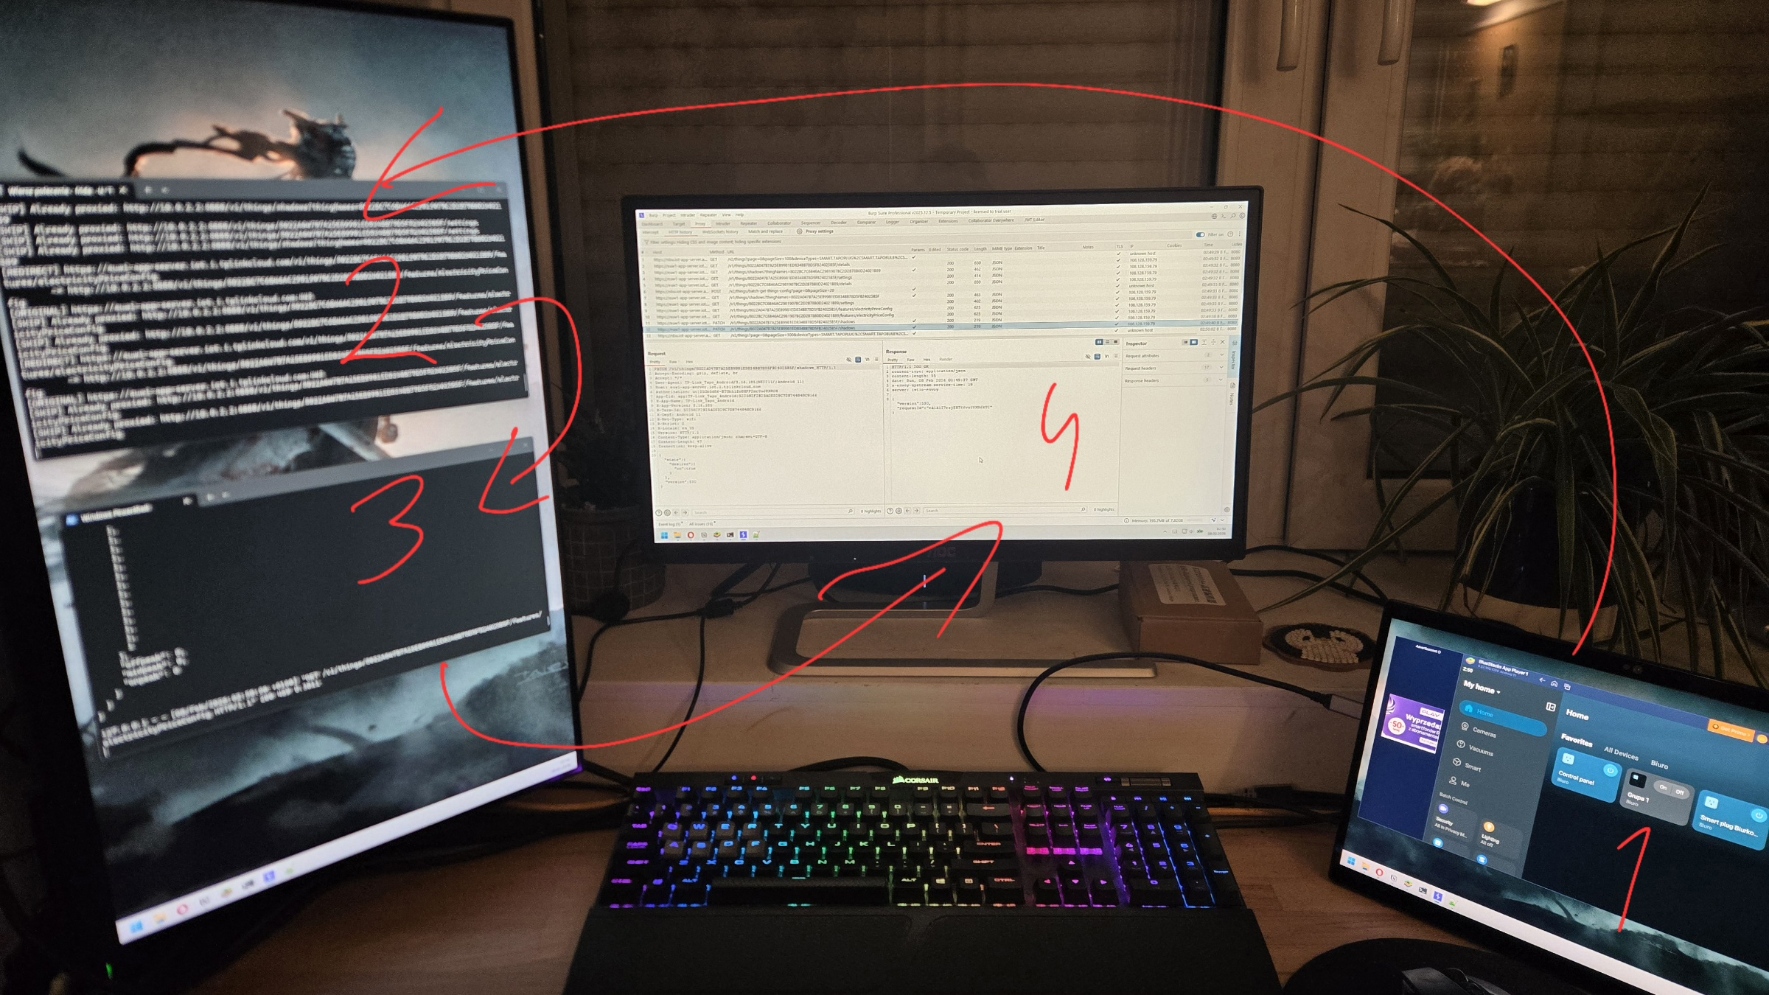
- BlueStacks emulator with the application running.
- Frida debugger attached and overwriting outgoing requests.
- Local Ruby server listening and logging all traffic.
- Burp Suite intercepting and inspecting forwarded requests.
Proxying http requests
Below is the code used to override the target host address:
Java.perform(function () {
    var Builder = Java.use("okhttp3.Request$Builder");
    var buildOv = Builder.build.overload();
    var HttpUrl = null;

    try { HttpUrl = Java.use("okhttp3.HttpUrl"); } catch (e) {}

    function parseHttpUrl(u) {
        if (!HttpUrl) return null;
        if (HttpUrl.parse) {
            try {
                return HttpUrl.parse.overload("java.lang.String").call(HttpUrl, u);
            } catch (e) {}
        }
        if (HttpUrl.Companion) {
            var c = null;
            try { c = HttpUrl.Companion.value; } catch (e) { c = HttpUrl.Companion; }
            if (c) {
                if (c.parse) {
                    try {
                        return c.parse.overload("java.lang.String").call(c, u);
                    } catch (e) {}
                }
                if (c.get) {
                    try {
                        return c.get.overload("java.lang.String").call(c, u);
                    } catch (e) {}
                }
            }
        }
        return null;
    }

    buildOv.implementation = function () {
        var req = buildOv.call(this);
        var originalUrl = req.url().toString();

        if (originalUrl.indexOf("10.0.2.2:8888") !== -1) {
            console.log("[SKIP] Already proxied: " + originalUrl);
            return req;
        }

        var urlObj = parseHttpUrl(originalUrl);
        if (urlObj == null) {
            console.log("[SKIP] Cannot parse URL: " + originalUrl);
            return req;
        }

        var originalHost = urlObj.host();
        var originalScheme = urlObj.scheme();
        var originalPort = urlObj.port();

        var path = urlObj.encodedPath();
        var query = urlObj.encodedQuery();
        var pathAndQuery = path + (query ? ("?" + query) : "");

        var newUrl = "http://10.0.2.2:8888" + pathAndQuery;

        console.log("[REDIRECT] " + originalUrl);
        console.log("        -> " + newUrl);
        console.log("[ORIGINAL] " + originalScheme + "://" + originalHost + ":" + originalPort);

        this.url(newUrl);
        this.header("X-Original-Host", originalHost);
        this.header("X-Original-Scheme", originalScheme);
        this.header("X-Original-Port", String(originalPort));
        this.header("X-Frida-Intercepted", "true");

        return buildOv.call(this);
    };

    console.log("[FRIDA] OkHttp Request.Builder hooked - redirecting ALL requests!");
})
Warning: This example script works with applications using the 'okhttp3' library. Other apps may rely on different networking libraries, so always verify this first and adjust your scripts accordingly.
With this setup, you should be well prepared to compete in CTFs that include Android reverse engineering challenges and possibly even apply some of these techniques in bug bounty research.
Good luck and happy hacking!
Bartosz Osuch
X
Comments (0)
Please log in to add a comment.